Introduction
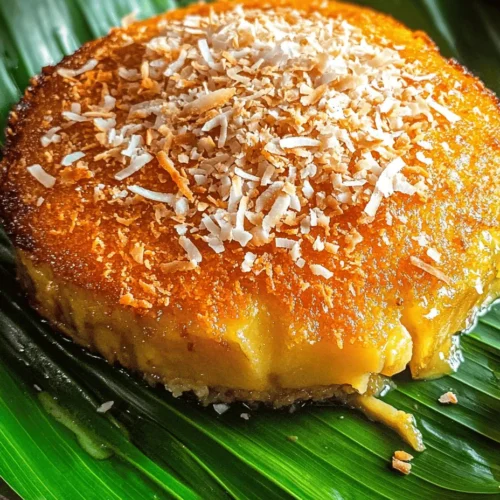
Bibingka is a cherished traditional delicacy in the Philippines, renowned for its soft, fluffy texture and rich flavors. This rice cake, typically enjoyed during the Christmas season, holds a special place in the hearts of Filipinos, symbolizing cultural heritage and festive spirit. Its warm, comforting aroma wafts through neighborhoods, inviting families and friends to gather and celebrate the holiday season. Bibingka is not merely a dish; it is a culinary experience that evokes nostalgia, with every bite transporting you to the vibrant streets of the Philippines.
The importance of Bibingka in Filipino culture cannot be overstated. It is a staple during the “Simbang Gabi,” a series of dawn masses celebrated in the lead-up to Christmas. Vendors often sell freshly baked Bibingka outside churches, providing a warm treat for parishioners. The communal aspect of enjoying Bibingka, often paired with hot chocolate or coffee, fosters a sense of unity and joy among families. This delightful rice cake is also served during other festive occasions, making it a versatile treat that resonates with many Filipino traditions.
What sets Bibingka apart is its unique combination of flavors and textures. The subtle sweetness from the sugar and ripe bananas complements the creamy coconut milk, while the rice flour provides a satisfying chewiness. The dish is often topped with grated coconut and sometimes salted eggs or cheese, adding layers of flavor that contribute to its popularity. It’s this harmonious blend of taste and texture that makes Bibingka a beloved favorite among both locals and those who have experienced Filipino cuisine.
Understanding Bibingka
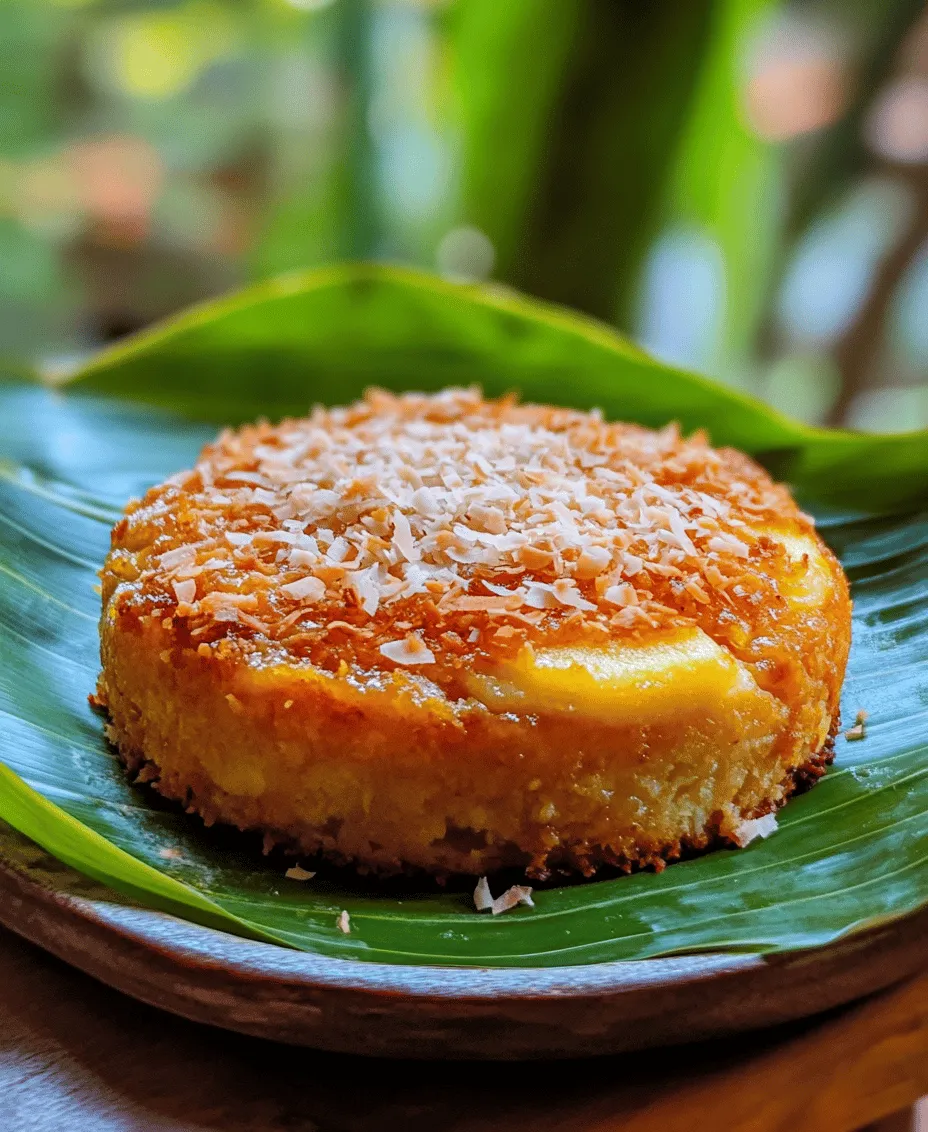
The origins of Bibingka can be traced back to the indigenous cooking traditions of the Philippines. Historically, it was made with ground rice and cooked in clay pots lined with banana leaves, a technique that is still prevalent today. This cooking method not only imparts a subtle flavor to the cake but also helps retain moisture, resulting in a delectably soft texture. Over the years, this beloved dish has evolved into various regional adaptations, each showcasing local ingredients and flavors.
In different parts of the Philippines, Bibingka takes on unique forms. In Luzon, for example, the traditional Bibingka is often topped with salted eggs and cheese, while in the Visayas region, it may include a richer blend of coconut and sweet toppings. Each variation tells a story of the local culture and the ingredients available, reflecting the diverse culinary landscape of the archipelago. Whether served as a snack, breakfast, or dessert, Bibingka remains a significant part of Filipino cuisine, celebrated for its versatility and flavor.
The ingredients used in Bibingka are not just for flavor; they carry cultural significance as well. Rice flour, a staple in Filipino cooking, serves as the foundation of this dish, providing structure and a chewy texture. Coconut milk, another key ingredient, enhances the flavor profile and contributes to the creaminess that makes Bibingka so satisfying. The inclusion of sugar is essential for balancing the sweetness, while ripe bananas add a unique twist, infusing the cake with natural sweetness and moisture. Grated coconut serves as a delightful topping, offering a chewy texture that complements the cake’s softness. Baking powder and salt play crucial roles in the baking process, ensuring that the Bibingka rises properly, while butter adds richness, enhancing both the flavor and moisture content.
Ingredients Breakdown
To create the perfect Traditional Filipino Bibingka Delight, it is essential to understand each ingredient’s role and significance in the recipe:
1. Rice Flour: The primary ingredient in Bibingka, rice flour is made by grinding rice into a fine powder. This gluten-free flour gives the cake its characteristic texture, allowing it to be soft yet slightly chewy. The use of rice flour also reflects the agricultural heritage of the Philippines, where rice has been a staple food for centuries.
2. Coconut Milk: Integral to the flavor profile of Bibingka, coconut milk adds creaminess and depth. It is made by extracting the liquid from grated coconut and is rich in healthy fats. This ingredient not only enhances the taste but also keeps the cake moist, preventing it from drying out during baking.
3. Sugar: A crucial element for sweetness, sugar balances the flavors in Bibingka. Traditional recipes often use cane sugar, which adds a distinct caramel-like flavor that pairs beautifully with the other ingredients. The amount of sugar can be adjusted according to personal preference, but it typically ranges from a moderate to a slightly sweet level.
4. Bananas: Ripe bananas add a natural sweetness and moisture to the cake. They can be mashed and incorporated into the batter, infusing the Bibingka with flavor and enhancing its tenderness. Bananas also provide a nutritional boost, making the dish a bit healthier.
5. Grated Coconut: Used as a topping, grated coconut adds texture and visual appeal. It can be fresh or desiccated, depending on availability. The slight chewiness of grated coconut enhances the experience of eating Bibingka, providing a delightful contrast to the soft cake.
6. Baking Powder and Salt: Essential for the baking process, baking powder helps the Bibingka rise, creating a light and fluffy texture. Salt, though used in small quantities, enhances the overall flavor by balancing the sweetness and bringing out the natural flavors of the ingredients.
7. Butter: Adding richness and moisture, butter is a key ingredient that elevates the flavor of the Bibingka. It contributes to the cake’s tenderness and helps create a golden crust when baked. Using quality butter can significantly impact the overall taste and texture of the finished product.
Preparation of Banana Leaves
An essential step in making traditional Bibingka is preparing the banana leaves, which serve both a functional and aesthetic purpose. Here’s a step-by-step guide on how to prepare banana leaves for baking:
1. Selecting the Leaves: Choose fresh, green banana leaves that are pliable and free from tears. Look for leaves that are large enough to line your baking pans or molds. If fresh banana leaves are not available, frozen ones can be a suitable alternative.
2. Cleaning the Leaves: Rinse the banana leaves under running water to remove any dirt or debris. This step is crucial, as it ensures that your Bibingka will be clean and safe to eat.
3. Softening the Leaves: To make the banana leaves more pliable, pass them over an open flame or dip them in hot water for a few seconds. This process softens the leaves, making them easier to fold and fit into your baking molds without tearing.
4. Cutting the Leaves: Once softened, cut the banana leaves to the appropriate size to line your baking pans. Typically, you should cut the leaves slightly larger than the pan to allow for easy handling.
5. Lining the Pans: Place the banana leaves into your baking pans, making sure they are well-fitted and cover the sides. This not only prevents the Bibingka from sticking but also imparts a subtle flavor to the cake during baking.
6. Handling Tips: When working with banana leaves, be gentle to avoid tearing. If you do have tears, you can overlap pieces to ensure complete coverage in your baking pan.
Using banana leaves not only adds authenticity to your Bibingka but also enhances the overall flavor, making it a truly traditional dish.
Mixing the Ingredients
With all your ingredients prepared, it’s time to mix them together to create the batter for your Traditional Filipino Bibingka Delight. Here’s a detailed guide on how to effectively combine the dry and wet ingredients:
1. Combine Dry Ingredients: In a large mixing bowl, start by sifting together the rice flour, baking powder, and salt. Sifting helps to aerate the flour and ensures that the baking powder is evenly distributed throughout the mixture.
2. Prepare the Wet Ingredients: In a separate bowl, mash the ripe bananas until smooth. Add the coconut milk and sugar to the mashed bananas, whisking until well combined. The mixture should be creamy and free of lumps, allowing the flavors to meld together beautifully.
3. Mixing Together: Gradually pour the wet mixture into the bowl containing the dry ingredients. Use a spatula or wooden spoon to gently fold the ingredients together. Be careful not to overmix, as this can lead to a denser texture in the finished cake. The goal is to combine the ingredients until just moistened.
4. Incorporate Butter: Melt the butter and let it cool slightly before adding it to the batter. Gently fold the melted butter into the mixture, ensuring that it is evenly distributed without overworking the batter.
5. Final Consistency Check: The final batter should be thick but pourable. If it appears too thick, you can add a little more coconut milk to achieve the desired consistency.
By following these steps, you’ll create a well-mixed batter that is ready for baking. The next stages will involve pouring the batter into your prepared pans, setting them up for baking, and ultimately enjoying the delightful flavors of your Traditional Filipino Bibingka Delight.
The Art of Mixing the Batter
When making traditional Filipino Bibingka, one of the crucial aspects to keep in mind is the handling of the batter. Overmixing can lead to a dense and rubbery texture, which is far from the light and fluffy consistency that is characteristic of a well-made Bibingka. Therefore, it’s essential to mix just until the ingredients are combined.
Visual Cues for Mixing: As you mix, look for certain visual cues to guide you. The batter should be smooth and slightly thick but still pourable. You’ll want to see small lumps of flour disappear without overworking the mixture. This means that the leavening agents will work effectively during baking, allowing the Bibingka to rise properly.
Assembling the Bibingka
Now that your batter is prepared, it’s time to assemble your Bibingka. The assembly process is straightforward but requires attention to detail for optimal flavor and presentation.
1. Prep the Pan: Start by lining your baking pan with banana leaves. If you can’t find banana leaves, parchment paper is a suitable substitute. Make sure to line the sides as well, allowing some overhang for easy removal later. This not only adds authenticity but also infuses the Bibingka with a subtle aroma.
2. First Layer: Pour a thin layer of batter into the prepared pan. This should cover the bottom evenly. The first layer acts as the base and helps to create a uniform texture.
3. Adding Cheese and Salted Eggs: Sprinkle a layer of grated cheese and slices of salted eggs over the batter. This is where the flavor begins to develop, so ensure an even distribution. The saltiness of the eggs complements the sweetness of the cake, creating a balanced profile.
4. Second Layer: Carefully pour another layer of batter on top. This layer should encase the fillings you just added. Make sure to pour gently to avoid disturbing the previous layer.
5. Final Touches: Once you have added the second layer of batter, you can optionally add more cheese or salted eggs on top for a beautiful finish.
6. Presentation: A well-presented Bibingka is as important as its taste. If you wish, you can garnish your Bibingka with a sprinkle of grated coconut or a dusting of sugar before baking. The visual appeal enhances the overall experience.
Baking the Bibingka
With the Bibingka assembled, the next step is baking. Preheating the oven is crucial for even baking. Set your oven to 375°F (190°C) and allow it to reach the desired temperature before placing your Bibingka inside.
Baking Time and Temperature: Bake your Bibingka for about 25-30 minutes. Keep in mind that oven temperatures can vary, so it may take slightly longer or shorter in different ovens.
Signs of Proper Baking: To determine if your Bibingka is properly baked, look for a golden-brown top and a slight pull away from the sides of the pan. A toothpick inserted into the center should come out clean or with a few crumbs attached, indicating it is cooked through.
Adding the Coconut Topping
No Bibingka is complete without its signature toasted coconut topping. This layer not only enhances the flavor but also adds a delightful crunch.
1. Preparing the Coconut: Use fresh or desiccated coconut for this topping. If using fresh coconut, finely shred it. For desiccated coconut, a light toast in a dry skillet over medium heat will enhance its flavor.
2. Toasting Technique: To achieve perfectly toasted coconut, spread it out in an even layer in a skillet, stirring frequently to prevent burning. It should take about 3-5 minutes to achieve a golden brown color.
3. Finishing Touches: Once your Bibingka is done baking, sprinkle the toasted coconut evenly over the top while it’s still warm. This will help the coconut adhere to the surface and infuse the cake with its rich flavor.
Serving Suggestions
Serving Bibingka is as delightful as making it. Traditionally, Bibingka is best enjoyed warm, but it can also be served at room temperature.
Pairing Suggestions: A drizzle of coconut milk or a sprinkle of sugar enhances the dish’s sweetness. You might also want to serve it alongside a cup of hot chocolate or coffee for a comforting combination.
Cultural Practices: In Filipino culture, Bibingka is often enjoyed during the Christmas season, particularly after attending the Misa de Gallo (a series of dawn masses). Sharing Bibingka with family and friends during this time fosters a sense of togetherness.
Nutritional Information
Bibingka is not just a delightful treat; it also carries nutritional benefits thanks to its wholesome ingredients.
– Overview of Nutritional Benefits: The primary ingredients such as rice flour, coconut milk, and eggs contribute to its nutritional profile. Rice flour is gluten-free, making it a suitable option for those with gluten sensitivities. Coconut milk provides healthy fats, while eggs add protein.
– Calories and Nutrients: A typical serving of Bibingka contains approximately 200-300 calories, depending on the portion size and ingredients used. It provides essential vitamins and minerals, including calcium, vitamin A, and potassium.
– Dietary Considerations: For those looking to adapt the recipe for dietary restrictions, consider using alternative sweeteners, plant-based toppings, or gluten-free flour blends.
Conclusion
Bibingka holds a cherished place in Filipino culture and cuisine, embodying the warmth and communal spirit of Filipino gatherings. This traditional rice cake is not just a dish to be savored but a means of connecting with heritage, family, and friendships.
As you attempt to make this delightful Bibingka at home, remember that the joy of cooking lies in the process and the sharing of meals. Embrace the experience of creating this beloved Filipino treat, and share it with loved ones to celebrate the rich tapestry of Filipino culinary heritage. Whether enjoyed warm or at room temperature, Bibingka is sure to bring smiles to the faces of those who indulge in it. So gather your ingredients, follow the steps outlined, and take pride in bringing a piece of the Philippines to your kitchen.