
Introduction
Sushi has taken the culinary world by storm, captivating food lovers with its exquisite flavors and artistic presentation. This Japanese delicacy is not just a meal; it’s an experience that combines fresh ingredients, intricate techniques, and a variety of textures. From traditional nigiri to creative rolls, sushi offers endless possibilities for customization, making it a popular choice for both casual diners and gourmet enthusiasts.
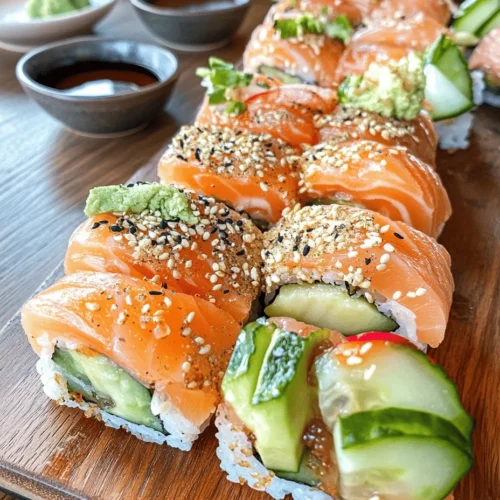
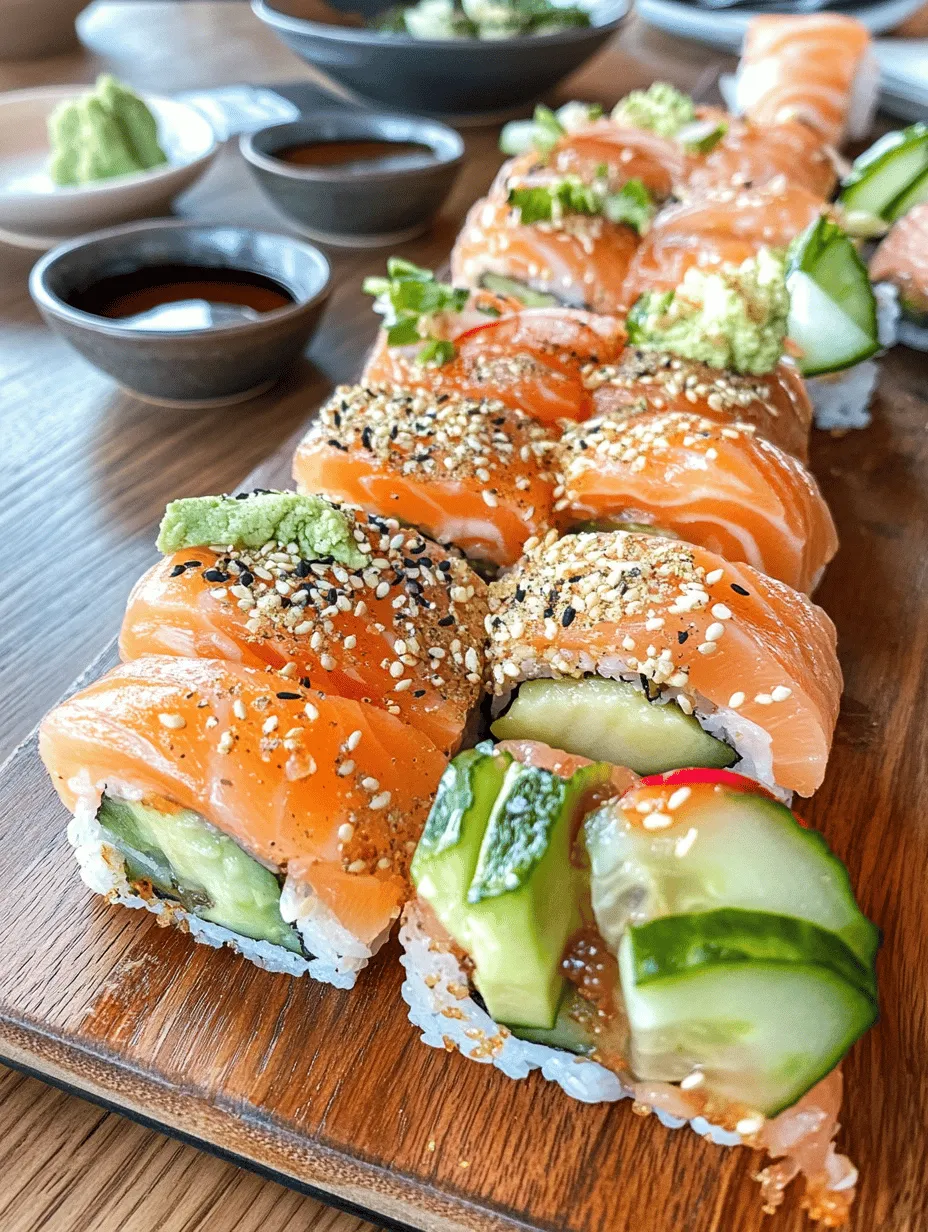
In this article, we will explore a unique twist on classic sushi: Baked Salmon Sushi Rolls. These delightful rolls marry the rich flavors of baked salmon with fresh vegetables, all wrapped in seasoned rice and nori. Whether you’re a sushi aficionado or a newcomer to this beloved dish, baked salmon sushi rolls are sure to impress with their smoky, savory taste and satisfying crunch.
In addition to being delicious, these sushi rolls come packed with health benefits. Salmon is a powerhouse of nutrients, rich in omega-3 fatty acids, protein, and essential vitamins. Combined with fresh vegetables like avocado and cucumber, these rolls provide a balanced meal that supports heart health and overall well-being.
Get ready to roll up your sleeves as we guide you through a step-by-step process to create these mouthwatering baked salmon sushi rolls at home. From sourcing the right ingredients to mastering the sushi rice, we’ll cover everything you need to know to bring a taste of Japan to your kitchen.
Understanding Sushi Rice
At the heart of every great sushi roll lies the foundation of sushi rice. Sushi rice, or “shari,” is a short-grain rice that has a distinct sticky texture when cooked. This stickiness is crucial for holding the roll together, providing structure and allowing flavors to meld beautifully.
What is Sushi Rice and Why It Matters
Sushi rice is specifically cultivated for sushi-making due to its higher starch content, which contributes to its unique texture. Unlike regular long-grain rice, sushi rice clumps together when cooked, making it ideal for rolling. Using the right type of rice is essential; substitutes like jasmine or basmati rice will not yield the same results.
The Importance of Rinsing and Cooking Sushi Rice Properly
One of the key steps in preparing sushi rice is rinsing it thoroughly. This process helps to remove excess starch, preventing the rice from becoming overly sticky or gummy. Rinsing also helps to achieve a clean, pure flavor that complements the other ingredients in your sushi rolls.
To rinse sushi rice, place it in a bowl and cover it with cold water. Gently swirl the rice with your hands, allowing the water to become cloudy. Drain the water and repeat this process until the water runs clear. This typically takes about three to four rinses.
Tips for Achieving the Perfect Texture
Once rinsed, the next step is cooking the rice. You can use either a rice cooker or the stovetop method, both of which can yield excellent results with a little attention to detail.
– Rice Cooker: If you have a rice cooker, simply add the rinsed rice and the appropriate amount of water (usually a 1:1 ratio) and let the machine do the work. Most rice cookers have a setting for sushi rice that will ensure perfect cooking.
– Stovetop: If using the stovetop, place the rinsed rice and water in a saucepan. Bring it to a boil, then reduce the heat to low, cover, and simmer for about 18-20 minutes until the water is absorbed. Allow the rice to sit covered for an additional 10 minutes off the heat to finish steaming.
After cooking, it’s important to season the rice with a mixture of rice vinegar, sugar, and salt. This not only enhances the flavor but also gives the rice that signature sushi taste.
Ingredients Breakdown
To create perfect baked salmon sushi rolls, you’ll need a selection of high-quality ingredients that contribute to both flavor and texture. Below is a detailed breakdown of each key component.
Sushi Rice: Characteristics and Alternatives
As discussed earlier, sushi rice is essential for making rolls that hold together. Look for short-grain sushi rice at your local Asian market or grocery store. If you cannot find sushi rice, you may use other short-grain varieties, but be cautious as they may not provide the same consistency or flavor profile.
Sushi-Grade Salmon: Importance of Quality and Sourcing
When it comes to sushi, the quality of the fish is non-negotiable. Always choose sushi-grade salmon, which is specifically handled and frozen to eliminate parasites. This ensures the fish is safe to eat raw or lightly cooked. Look for fresh salmon at trusted fish markets or specialty grocery stores, and don’t hesitate to ask about its sourcing to guarantee its quality.
Fresh Vegetables: Health Benefits and Flavor Profiles of Avocado and Cucumber
Avocado and cucumber are popular choices for sushi fillings, both for their taste and health benefits. Avocado adds a creamy texture and rich flavor, while cucumber contributes a refreshing crunch. Both are low in calories and provide essential vitamins and minerals, making them excellent additions to your baked salmon sushi rolls.
Nori Sheets: Types and Where to Find Them
Nori is the seaweed used to wrap sushi rolls. It comes in various grades, from premium to standard. For sushi rolls, opt for roasted nori sheets, which are usually found in the international aisle of grocery stores or at Asian markets. Look for nori that is dark green and has a glossy sheen, indicating freshness.
Condiments: Role of Spicy Mayo, Soy Sauce, Pickled Ginger, and Wasabi
To elevate your baked salmon sushi rolls, consider serving them with a selection of condiments. Spicy mayo, made with mayonnaise and sriracha, adds a creamy heat that complements the salmon perfectly. Soy sauce is a classic pairing for sushi, enhancing the umami flavor. Additionally, pickled ginger serves as a palate cleanser, while wasabi adds a spicy kick that many sushi lovers enjoy.
Preparing the Sushi Rice
Now that we’ve covered the essential ingredients, let’s dive into the preparation of sushi rice, which is a crucial step in making your baked salmon sushi rolls.
Step-by-Step Guide to Rinsing and Cooking Sushi Rice
1. Rinse the Rice: As previously mentioned, begin by rinsing the sushi rice under cold water until the water runs clear. This removes excess starch and prevents the rice from becoming too sticky.
2. Cooking the Rice: Once rinsed, transfer the rice to your rice cooker or saucepan. If using a rice cooker, add the appropriate water and start the machine. For stovetop cooking, add water in a 1:1 ratio and bring to a boil before reducing the heat and simmering.
3. Let It Steam: After the rice has cooked, allow it to sit covered for an additional 10 minutes. This resting period helps the rice achieve the ideal texture.
Importance of Removing Excess Starch
Removing excess starch during rinsing is critical for achieving the right consistency in sushi rice. Without thorough rinsing, the starch can cause the rice to clump together excessively, resulting in a chewy texture that is less desirable for sushi.
Cooking Methods: Rice Cooker vs. Stovetop
Both cooking methods have their merits, and your choice may depend on your kitchen setup. A rice cooker is convenient and often yields consistent results with minimal effort. Meanwhile, stovetop cooking can be more hands-on, allowing you to monitor the rice closely.
How to Season Sushi Rice for Flavor Enhancement
Once your sushi rice is cooked and fluffed, it’s time to season it for that authentic sushi flavor. In a small bowl, mix rice vinegar, sugar, and salt until the sugar dissolves.
Explanation of Rice Vinegar, Sugar, and Salt Mixture
– Rice Vinegar: Adds acidity to balance the flavors and helps preserve the rice.
– Sugar: Provides a hint of sweetness that enhances the overall taste.
– Salt: Elevates the flavor profile and brings out the natural sweetness of the rice.
Drizzle this mixture over the warm rice and gently fold it in using a spatula. Be careful not to mash the rice; you want to keep the grains intact while allowing the seasoning to coat them evenly.
Cooking the Salmon
Now that your sushi rice is ready, it’s time to prepare the star of the dish: the salmon. Baked salmon adds a rich flavor and firm texture to your sushi rolls, making it a delightful alternative to raw fish.
Prepping the Salmon for Baking
Start with sushi-grade salmon fillets. If the fillet includes skin, you can choose to leave it on or remove it, depending on your preference. Cut the salmon into equal-sized strips that will fit comfortably inside your sushi rolls.
Seasoning Tips for Enhanced Flavor
To bring out the best in your salmon, consider seasoning it before baking. A simple blend of soy sauce, sesame oil, and a touch of honey or brown sugar can enhance the natural flavor of the fish. Allow the salmon to marinate for about 15 minutes for the flavors to penetrate.
Once seasoned, preheat your oven to 375°F (190°C). Arrange the salmon strips on a baking sheet lined with parchment paper and bake for about 12-15 minutes, or until the salmon is cooked through and flakes easily with a fork.
Now that we’ve covered the foundational elements of preparing baked salmon sushi rolls, including the essential ingredients and sushi rice, we are poised to continue with the assembly and final touches in the next part of our guide. Stay tuned for an exciting culinary journey that will lead you to create your very own baked salmon sushi rolls from scratch!
Baking Temperature and Time for Optimal Results
To achieve perfectly baked salmon sushi rolls, it’s essential to pay attention to the baking temperature and time. Preheat your oven to 375°F (190°C). This temperature is ideal for ensuring that the salmon cooks evenly without drying out. Depending on the thickness of your salmon fillets, baking typically takes between 15 to 20 minutes. A good rule of thumb is to check for doneness after 15 minutes; the salmon should be opaque and flake easily with a fork. If you prefer your salmon slightly more well-done, you can extend the baking time by a couple of minutes, but be cautious not to overcook it, as this can lead to a dry texture.
How to Flake the Salmon for Easy Rolling
Once your salmon is baked and has cooled slightly, it’s time to flake it for the sushi rolls. Using a fork, gently break the salmon into bite-sized pieces, ensuring not to shred it too finely. The goal is to have manageable chunks that can be easily placed in your sushi rolls without falling apart. Flaking the salmon while it’s still warm will help maintain its moisture and flavor, making it easier to work with. Set the flaked salmon aside while you prepare the spicy mayo and assemble your sushi rolls.
Creating the Spicy Mayo
Importance of the Spicy Mayo in Sushi Rolls
Spicy mayo is a crucial component in many sushi rolls, as it adds a creamy texture and a kick of heat that complements the flavors of the salmon and other fillings. This sauce enhances the overall taste profile of the sushi, making each bite a delightful experience.
Detailed Recipe for Mixing Mayonnaise and Sriracha
To create your spicy mayo, you will need the following ingredients:
– 1/2 cup mayonnaise (preferably Japanese mayonnaise for authenticity)
– 2 tablespoons Sriracha sauce
– Optional: 1 teaspoon of lemon juice for added brightness
Instructions:
1. In a small mixing bowl, combine the mayonnaise and Sriracha sauce.
2. Stir well until the mixture is smooth and the ingredients are fully incorporated.
3. If desired, add the lemon juice to cut through the richness of the mayonnaise and balance the flavors. Mix again until combined.
Taste the sauce and adjust the heat level by adding more Sriracha if you prefer a spicier version. This simple yet flavorful sauce will elevate your baked salmon sushi rolls.
Customization Options for Different Heat Levels
The beauty of spicy mayo is its versatility. You can customize the heat level to suit your preferences:
– Mild: Use less Sriracha or mix in a touch of honey or agave syrup to balance the heat.
– Medium: Stick to the original recipe but add in a sprinkle of cayenne pepper for extra warmth.
– Spicy: Increase the Sriracha or add chopped jalapeños or other hot sauces to give it that fiery kick. Experimenting with different hot sauces can lead to exciting flavor combinations.
Assembling the Sushi Rolls
Step-by-Step Instructions for Rolling Sushi
With your flaked salmon and spicy mayo ready, it’s time to assemble your sushi rolls.
What You Will Need:
– Sushi rice (prepared and cooled)
– Nori sheets (seaweed)
– Flaked salmon
– Avocado (sliced)
– Cucumber (julienned)
– Bamboo sushi mat
Instructions:
1. Prepare Your Mat: Lay your bamboo mat on a clean, flat surface. Place a sheet of plastic wrap over the mat to prevent sticking.
2. Spread the Rice: Wet your hands to prevent the rice from sticking. Take a handful of sushi rice and spread it evenly over the nori sheet, leaving about an inch of space at the top. Press gently to compact the rice but avoid squishing it.
3. Add Fillings: Arrange a line of flaked salmon, a few slices of avocado, and julienned cucumber horizontally across the center of the rice.
4. Drizzle Spicy Mayo: Add a thin line of spicy mayo over the fillings for an extra burst of flavor.
5. Roll the Sushi: Starting from the bottom edge of the mat, carefully lift it to begin rolling the sushi away from you. Tuck the fillings in as you roll, applying gentle pressure to keep the roll tight.
6. Seal the Roll: Once you reach the exposed edge of the nori, use a little water on your fingers to moisten it. Press to seal the roll firmly.
7. Repeat: Continue this process with the remaining nori sheets and fillings until you have made your desired number of rolls.
Importance of Using a Bamboo Mat
Using a bamboo mat is crucial for creating tightly rolled sushi. The mat provides the necessary support and pressure to shape the rolls evenly. It also helps in achieving a consistent thickness throughout the roll, ensuring that every bite is enjoyable.
Slicing and Serving the Sushi Rolls
Tips for Slicing Sushi for Presentation
After your sushi rolls are assembled, it’s time to slice them into pieces for serving. The presentation can elevate your homemade sushi experience, so here are some tips:
1. Use a Sharp Knife: A sharp knife is essential for clean cuts. A dull knife can crush the roll and ruin its appearance.
2. Wet the Knife: Dipping the knife in water between cuts helps prevent the rice from sticking and keeps the edges clean.
3. Slice with a Gentle Motion: Instead of sawing back and forth, use a smooth, single motion to slice through the roll. Aim for bite-sized pieces (about 1 inch thick).
Ideas for Garnishing and Serving Suggestions
To make your sushi rolls even more appealing, consider the following garnishing ideas:
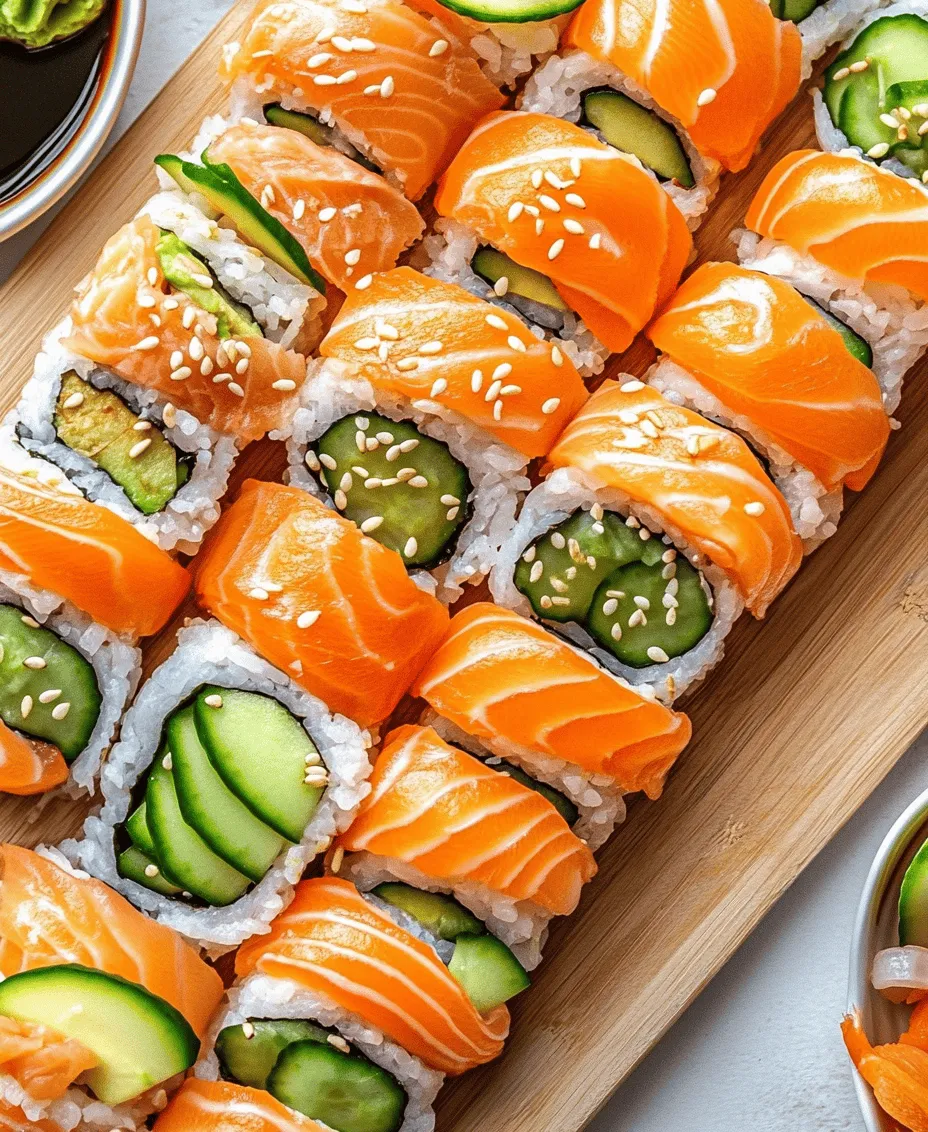
– Sesame Seeds: Sprinkle toasted sesame seeds over the top of the rolls for added flavor and crunch.
– Microgreens: Add a touch of freshness with microgreens or sprouts alongside the sushi.
– Pickled Vegetables: Serve with pickled ginger or daikon for a contrasting flavor and a pop of color.
Arranging on a Platter
Presentation is key when serving sushi. Arrange the sliced sushi rolls on a platter, alternating directions for visual interest. You can also serve them with small bowls of soy sauce, pickled ginger, and wasabi for dipping.
Pairing with Soy Sauce, Pickled Ginger, and Wasabi
Traditional accompaniments for sushi include soy sauce, which adds a salty umami flavor, pickled ginger for palate cleansing, and wasabi for a spicy kick. Encourage your guests to experiment with different combinations to find their perfect pairing.
Nutritional Benefits of Baked Salmon Sushi Rolls
These baked salmon sushi rolls are not only delicious but also packed with nutritional benefits. Here’s a closer look at the health advantages of the main ingredients:
Omega-3 Fatty Acids from Salmon
Salmon is renowned for being a rich source of omega-3 fatty acids, which are vital for heart health. These healthy fats can help reduce inflammation, lower blood pressure, and improve overall cardiovascular health. Additionally, omega-3s are essential for brain function and may contribute to improved cognitive performance.
Nutritional Value of Avocado and Cucumber
Avocado is another star ingredient in these sushi rolls. It is loaded with healthy monounsaturated fats, vitamins, and minerals. Avocado provides fiber, which aids digestion, and contributes to a feeling of fullness, making this sushi a satisfying meal option.
Cucumber, on the other hand, is low in calories and high in water content, making it a refreshing addition that adds crunch without the extra calories. It also contains vitamins K and C, as well as antioxidants that promote overall health.
Discussing the Balance of Flavors and Textures
The combination of baked salmon, creamy avocado, and crunchy cucumber creates a delightful balance of flavors and textures in each bite. The umami of the salmon contrasts beautifully with the creaminess of the avocado and the crispness of the cucumber, offering a well-rounded sushi experience.
Conclusion
Making baked salmon sushi rolls at home is not only a rewarding culinary adventure but also a delightful way to enjoy fresh, flavorful sushi without the need for raw fish. The baking process enhances the salmon’s natural flavors while keeping it moist and tender. As you gather your family and friends to share this delicious creation, you’ll find joy in both the cooking and sharing experience.
Encourage your loved ones to join you in the kitchen and make this recipe together, fostering a sense of community and creativity. Whether it’s a casual weeknight dinner or a special occasion, these homemade sushi rolls are sure to impress. Don’t forget to share this recipe with friends and family, sparking their interest in creating their own sushi masterpieces. Enjoy the process, relish the flavors, and celebrate the joy of homemade sushi rolls!