
Introduction
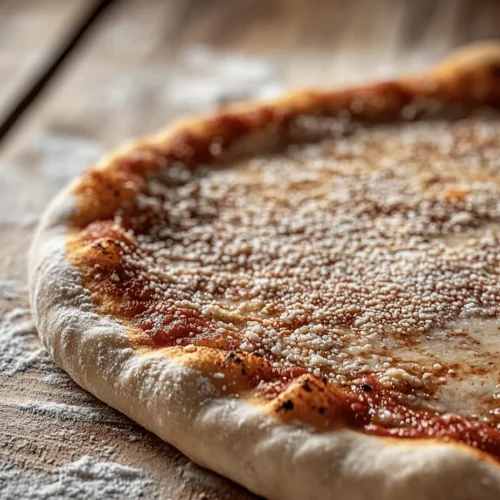
There’s something truly magical about the process of making pizza from scratch, especially when it comes to crafting artisan pizza dough. This dough serves as the foundation of your pizza, and its quality can dramatically influence the final result. Whether you’re a seasoned chef or a novice in the kitchen, mastering this dough is essential for creating delicious, restaurant-quality pizzas at home.
Artisan pizza dough is celebrated for its simplicity and quality. While it may seem daunting, the process is straightforward and incredibly rewarding. The satisfaction that comes from kneading your own dough, watching it rise, and transforming it into a delectable pizza is unparalleled. This recipe emphasizes the balance between using high-quality ingredients and simple techniques to achieve a dough that is both flavorful and easy to work with.
In this guide, we will delve into the essential ingredients that make up artisan pizza dough, understand their roles, and walk through step-by-step instructions to help you create the perfect base for your pizza masterpieces.
Understanding the Ingredients
Creating artisan pizza dough is a simple yet rewarding process that relies on a handful of key ingredients. Each component plays a vital role in developing the dough’s texture, flavor, and overall quality. Let’s explore each ingredient in detail to better understand how they contribute to the final product.
Flour: The Backbone of the Dough
At the core of any pizza dough is flour, which serves as the backbone of the recipe. All-purpose flour is the most common choice due to its versatility and balanced gluten content, which is essential for creating a chewy and satisfying crust. The right flour will yield a dough that rises beautifully and has the perfect texture when baked.
When flour is mixed with water and kneaded, it forms gluten, a protein that gives the dough structure and elasticity. This gluten development is crucial, as it enables the dough to stretch and hold its shape during the rising and baking processes. For those seeking a more artisanal approach, using bread flour, which has a higher protein content, can enhance the dough’s chewiness and create a more robust crust.
Yeast: The Key to Rising
Yeast is the magical ingredient that brings your dough to life. For artisan pizza dough, active dry yeast is commonly used because of its reliability and ease of use. Yeast is a microorganism that ferments sugars, producing carbon dioxide gas as a byproduct. This gas is what causes the dough to rise, resulting in a light and airy crust.
When activating yeast, it’s essential to provide the right conditions for it to thrive. This typically involves dissolving the yeast in warm water (around 110°F) with a bit of sugar, which serves as food for the yeast. Once it blooms—forming a frothy layer on top—you’ll know it’s ready to be mixed into your dough. Understanding how to properly activate yeast is crucial to achieving that perfect rise.
Salt: Enhancing Flavor and Structure
Salt is a key player in enhancing the flavor of your pizza dough. It not only adds a savory dimension to the dough but also strengthens its structure. When incorporated into the dough, salt helps regulate yeast fermentation, ensuring that the dough rises at a controlled pace. This results in a more flavorful and well-textured crust.
Using a quality sea salt is recommended, as it contains trace minerals that can further enhance the taste of the dough. It’s important to mix the salt evenly with the flour before combining it with the wet ingredients to ensure a consistent flavor throughout.
Sugar: A Touch of Sweetness
While sugar may seem like an optional ingredient in pizza dough, it plays a significant role in the fermentation process. Sugar serves as food for the yeast, helping it to activate and multiply. It also contributes a slight sweetness to the dough, balancing the overall flavor profile.
In most artisan pizza dough recipes, a small amount of sugar is sufficient—typically around a teaspoon. This amount is enough to aid yeast activation without making the dough overly sweet. The sugar also aids in browning the crust during baking, resulting in a beautifully golden finish.
Water: The Essential Liquid
Water is essential in any dough recipe as it hydrates the flour and activates the gluten. For artisan pizza dough, warm water is preferred, as it helps to activate the yeast more effectively. The temperature of the water should ideally be around 110°F to ensure optimal yeast activation without killing the yeast.
The amount of water used can vary depending on the humidity and type of flour, so it’s important to adjust according to the dough’s consistency. A well-hydrated dough is crucial for achieving a light and airy crust that will hold its shape when stretched.
Olive Oil: For Richness and Flavor
Olive oil is often added to artisan pizza dough for its rich flavor and moisture. It enhances the dough’s texture, making it more pliable and easier to work with. Additionally, olive oil contributes to a tender crust that is slightly crisp on the outside while remaining soft on the inside.
Using high-quality extra virgin olive oil can elevate the flavor of your dough, giving it a deliciously rich taste that pairs perfectly with various toppings. It’s recommended to incorporate this ingredient after mixing the dry and wet components, allowing for even distribution throughout the dough.
Cornmeal: The Perfect Dusting Agent
Cornmeal is typically used for dusting the pizza peel or baking surface before placing the dough on it. This simple step is crucial for preventing the dough from sticking and allows for easy transfer to the oven. Additionally, cornmeal adds a subtle texture to the base of the pizza, enhancing the overall eating experience.
Choosing a fine or medium grind cornmeal is ideal, as it will provide a nice surface without being overly gritty. The use of cornmeal is not only practical but also contributes to the artisanal quality of your final pizza.
Step-by-Step Instructions for Making Artisan Pizza Dough
Now that we have a solid understanding of the ingredients, let’s move on to the step-by-step instructions for making artisan pizza dough. This process is straightforward and can be broken down into manageable steps, ensuring that even beginner cooks can follow along with ease.
Activating the Yeast
1. Measure Warm Water: Begin by measuring out 1 ½ cups of warm water (approximately 110°F). It’s crucial to use a thermometer if you’re unsure about the temperature, as water that is too hot can kill the yeast.
2. Add Sugar and Yeast: In a small bowl, combine the warm water with 1 teaspoon of sugar and 2 teaspoons of active dry yeast. Stir gently to dissolve the yeast and sugar.
3. Let It Bloom: Allow the mixture to sit for about 5-10 minutes. During this time, you should see bubbles forming on the surface, indicating that the yeast is active and ready to be incorporated into the dough.
Mixing the Dry Ingredients
1. Combine Flour and Salt: In a large mixing bowl, whisk together 4 cups of all-purpose flour and 2 teaspoons of sea salt. Whisking ensures that the salt is evenly distributed throughout the flour.
2. Create a Well: After mixing the flour and salt, create a well in the center of the dry ingredients. This will be where you pour in the yeast mixture and olive oil.
3. Add Yeast Mixture and Olive Oil: Pour the activated yeast mixture into the well, along with 2 tablespoons of extra virgin olive oil.
4. Mix to Combine: Using a wooden spoon or spatula, begin to mix the flour into the liquid, gradually incorporating the dry ingredients until a shaggy dough forms.
Kneading the Dough
Once the dough has come together, it’s time to knead it to develop the gluten structure.
1. Transfer to a Floured Surface: Lightly flour a clean work surface and transfer the dough onto it.
2. Knead the Dough: With floured hands, begin kneading the dough by folding it over itself and pushing it away with the heel of your hand. Rotate the dough a quarter turn and repeat the process. Knead for about 8-10 minutes until the dough is smooth and elastic.
3. Check for Proper Texture: The dough should be slightly tacky but not overly sticky. If it feels too sticky, sprinkle a little more flour as needed while kneading.
By following these steps carefully, you’ll be well on your way to creating a beautifully crafted artisan pizza dough that serves as the perfect base for your homemade pizzas. The journey of making pizza from scratch is not only about the end product but also about the love and care put into each step. Stay tuned for the next part, where we will discuss how to let the dough rise, shape it, and prepare it for baking.
Combining Wet and Dry Ingredients
To create your artisan pizza dough, start by combining the wet and dry ingredients. Begin by sifting the flour into a large mixing bowl, creating a fluffy texture that allows for better incorporation of the other elements. Once you have your flour in the bowl, create a well in the center. This well is essential as it will be the place where you add your yeast mixture and olive oil, ensuring that these ingredients are evenly distributed throughout the dough.
In a separate bowl, mix together your warm water and yeast, allowing it to sit for about 5-10 minutes until it becomes frothy. This signifies that your yeast is active and ready to work its magic in the dough. Once the yeast is activated, pour it into the well you created in the flour. Add the olive oil at this point as well. Using a fork, gently mix the flour from the outer edges of the well into the liquid in the center. This gradual incorporation prevents lumps and ensures a smooth dough.
Kneading the Dough
Once the wet and dry ingredients are combined, it’s time to knead the dough. Turn the mixture out onto a lightly floured surface and begin to knead it with your hands. Kneading is a crucial step as it develops the gluten, giving the dough structure and elasticity. To knead, fold the dough over itself and push it down with the heel of your hand. Rotate it a quarter turn and repeat the process.
After about 8-10 minutes of kneading, the dough should become smooth and elastic. A well-kneaded dough will feel slightly tacky but should not stick to your hands or the work surface. If the dough is too sticky, you can sprinkle a little more flour as needed. Conversely, if the dough feels too dry, add a few drops of water. This balancing act is essential for achieving the ideal dough consistency.
The First Rise: Creating a Fluffy Texture
Now that you’ve kneaded your dough, it’s time for the first rise, which is critical for developing a fluffy texture. Place the dough ball in a lightly greased bowl, turning it to coat all sides in oil. This helps prevent the dough from drying out. Cover the bowl with a clean kitchen towel or plastic wrap and set it in a warm, draft-free environment.
An ideal rising temperature is around 75-80°F (24-27°C). If your kitchen is cool, you can create a warm environment by turning on your oven for a minute or two, then turning it off and placing the dough inside. Let the dough rise for about 1 to 2 hours, or until it has doubled in size. This process allows the yeast to ferment, creating air bubbles that will give your pizza crust its delightful texture.
Prepping for Baking
While your dough is rising, it’s time to prepare your oven and pizza stone or baking sheet. Preheating your oven is crucial for achieving a crispy crust. Set your oven to the highest temperature, usually around 475°F (245°C) or higher, and place your pizza stone on the middle rack to heat up as well.
If you don’t have a pizza stone, a baking sheet works fine; just place it upside down in the oven to create a flat surface for baking. Allow at least 30 minutes for your stone or baking sheet to preheat. This step is essential as it ensures that the dough begins to cook immediately upon contact, preventing it from becoming soggy.
Shaping the Dough
Once your dough has risen, it’s time to shape it into pizza crusts. Start by turning the dough out onto a lightly floured surface. Use your fingers to gently deflate the dough, then divide it into equal portions based on your desired pizza size. For personal-sized pizzas, a quarter of the dough works well; for larger pizzas, you might use half.
To shape the dough, take one portion and flatten it slightly with your hands. Then, using your fingers, stretch the dough from the center outward, leaving the edges thicker to form the crust. Alternatively, you can use a rolling pin if you prefer a more uniform thickness, but keep in mind that shaping by hand can yield a more rustic and artisanal look. Aim for a thickness of about ¼ inch for a classic pizza crust.
Choosing Toppings for Your Artisan Pizza
The beauty of artisan pizza lies in its versatility when it comes to toppings. Start with a classic margherita pizza by spreading a thin layer of tomato sauce on the base, followed by slices of fresh mozzarella and a sprinkle of fresh basil. However, don’t hesitate to get creative!
Consider gourmet options such as pear and gorgonzola, or roasted vegetables with goat cheese. For meat lovers, prosciutto paired with arugula and a drizzle of balsamic glaze creates a delightful contrast. Remember to balance flavors and textures; for instance, if you opt for a rich topping like sausage, complement it with something lighter, such as a fresh salad or a drizzle of olive oil after baking.
Baking Your Pizza to Perfection
With your pizza assembled and your oven preheated, it’s time to bake. Carefully transfer your pizza onto the hot pizza stone or baking sheet. If you are using a pizza peel, sprinkle it with flour before placing the pizza on it to prevent sticking. Bake your pizza for about 10-15 minutes, depending on your oven and the thickness of the crust.
Keep an eye on the pizza; you want the crust to be golden brown and the cheese to be bubbly and slightly browned. For an extra crispy crust, you can turn on the broiler for the last couple of minutes, but watch closely to avoid burning.
Cooling and Serving Your Pizza
Once your pizza is out of the oven, it’s essential to let it cool for a few minutes before slicing. This resting period allows the cheese to set slightly and makes it easier to cut. Use a pizza cutter or a sharp knife to slice your pizza into wedges.
Presentation matters, so consider serving your pizza on a wooden board or a decorative platter. A sprinkle of fresh herbs or a drizzle of olive oil can elevate its visual appeal. Pair your artisan pizza with a fresh salad or a glass of wine for a complete meal experience.
Frequently Asked Questions About Artisan Pizza Dough
What if my dough doesn’t rise?
If your dough doesn’t rise, it could be due to inactive yeast. Ensure your yeast is fresh and activated properly. If your kitchen is too cold, try moving the dough to a warmer location or giving it more time to rise.
Can I make the dough ahead of time?
Absolutely! You can prepare the dough in advance and store it in the refrigerator for up to 24 hours. Just be sure to let it come to room temperature before shaping.
How do I store leftover dough?
Wrap leftover dough tightly in plastic wrap or place it in an airtight container. It can be stored in the refrigerator for up to 3 days or frozen for longer storage.
Can I freeze the dough?
Yes, you can freeze the dough! After the first rise, wrap it tightly in plastic wrap and place it in a freezer-safe bag. When ready to use, thaw it overnight in the refrigerator before shaping.
The Art of Enjoying Homemade Pizza
Homemade pizza is more than just a meal; it’s an experience. The joy of sharing a fresh, artisanal pizza with family and friends can turn an ordinary evening into a memorable occasion. Whether it’s a casual weeknight dinner or a festive gathering, pizza brings people together.
The versatility of pizza allows for endless customization, making it suitable for any palate. Encourage your guests to get involved by setting up a pizza-making station with various toppings, allowing everyone to create their unique masterpiece.
Conclusion
Creating artisan pizza dough from scratch is a rewarding endeavor that brings both satisfaction and delicious results. By following the steps outlined—from mixing the ingredients to choosing the perfect toppings—you can create a pizza that rivals any pizzeria.
With a bit of patience and practice, anyone can master the art of pizza making. The process allows for creativity and experimentation, making every pizza night a new culinary adventure. Remember, the joy of making pizza lies not only in the finished product but in the shared experience of creating something wonderful with loved ones. So roll up your sleeves, gather your ingredients, and let the pizza-making fun begin!