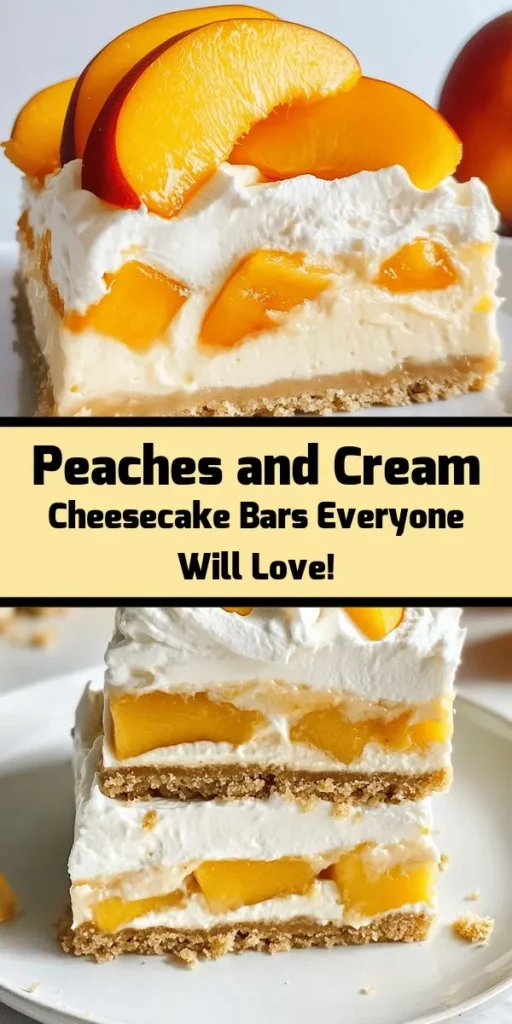
There’s something undeniably charming about the combination of peaches and cream, especially when transformed into a decadent dessert like cheesecake bars. As summer rolls around and fresh peaches become abundant, this recipe for Peaches and Cream Cheesecake Bars emerges as a perfect way to celebrate seasonal fruits. The creamy, smooth texture of the cheesecake combined with the natural sweetness of ripe peaches creates a harmonious balance that tantalizes the taste buds and makes for a delightful sweet treat.
The Importance of Seasonal Fruits in Desserts
Seasonal fruits bring an extraordinary depth of flavor and texture to desserts, elevating them from ordinary to extraordinary. Using fresh ingredients not only enhances the taste but also adds a vibrant color and nutritional value to the dish. In the case of our Peaches and Cream Cheesecake Bars, ripe, juicy peaches provide a fresh burst of flavor that complements the rich, creamy cheesecake filling. The sweetness of the fruit balances out the tanginess of the cream cheese, creating a dessert that is both indulgent and refreshing.
In this article, you can expect a comprehensive guide that will take you through the entire process of making these delightful cheesecake bars. From understanding the ingredients and preparing for success to crafting the perfect graham cracker crust and creamy filling, every step will be detailed to ensure you achieve the best results. Whether you are entertaining guests or simply treating yourself, these cheesecake bars are sure to impress with their luscious flavors and beautiful presentation.
Understanding the Ingredients
To create the perfect Peaches and Cream Cheesecake Bars, it’s essential to understand the key ingredients that contribute to the overall flavor and texture. Below, we delve into each component and its role in the recipe.
Fresh Peaches
The star of our dessert is undoubtedly the fresh peaches. When selecting peaches for this recipe, look for those that are ripe, fragrant, and slightly soft to the touch. Fresh peaches not only add natural sweetness but also a juicy texture that contrasts beautifully with the creamy cheesecake filling. If fresh peaches are out of season, you can opt for frozen peaches, but be sure to thaw and drain them to avoid excess moisture in the filling.
Cream Cheese and Sour Cream
Cream cheese is the foundation of any cheesecake, providing that signature creamy texture we all love. In this recipe, we also incorporate sour cream, which adds a tangy flavor and helps to create a smooth consistency. Combining these two ingredients results in a rich filling that is both creamy and light, perfect for the peaches to shine through.
Graham Cracker Crumbs
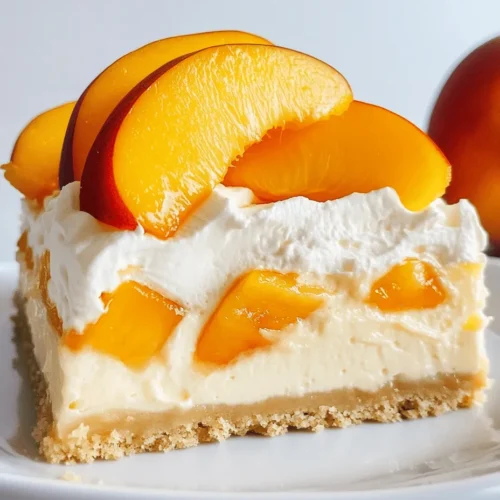
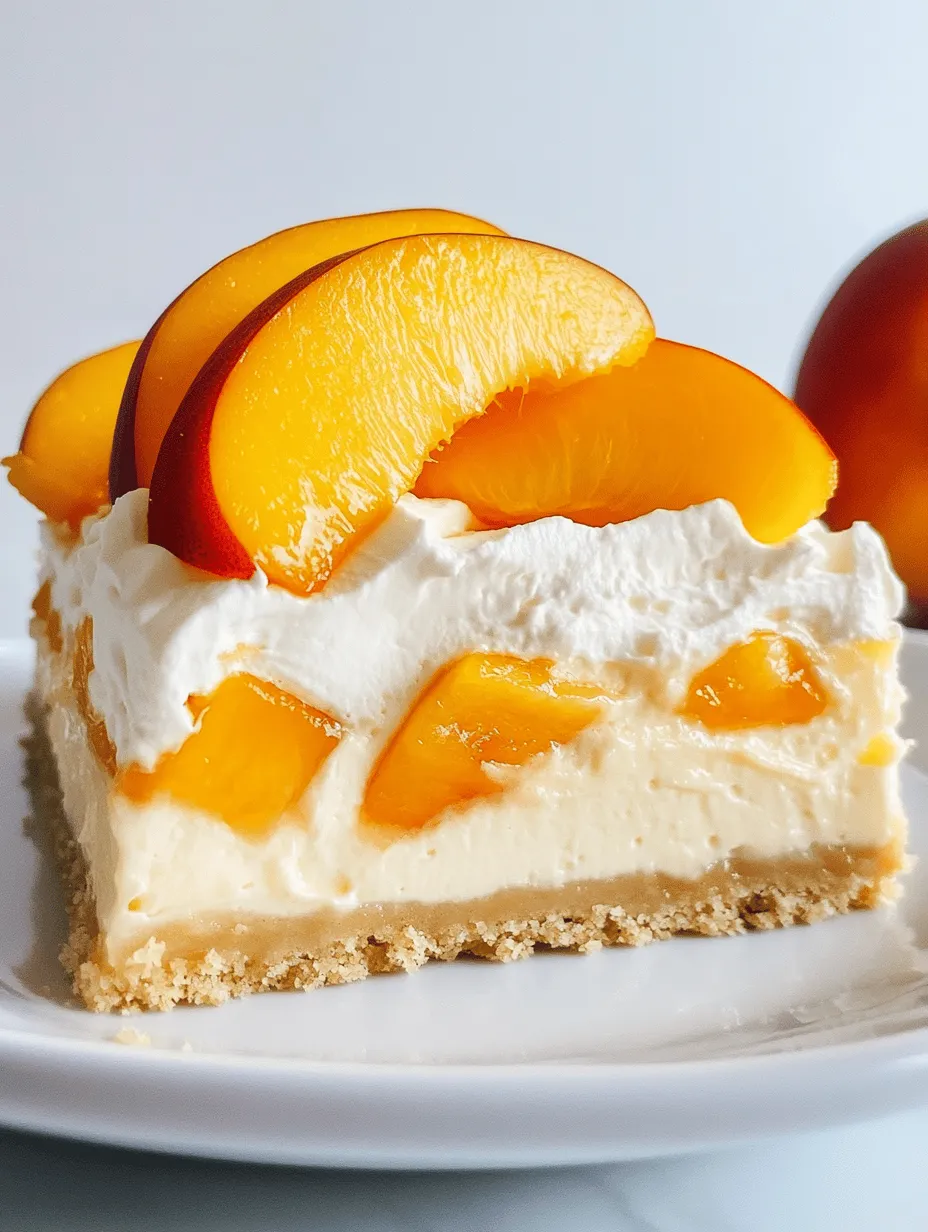
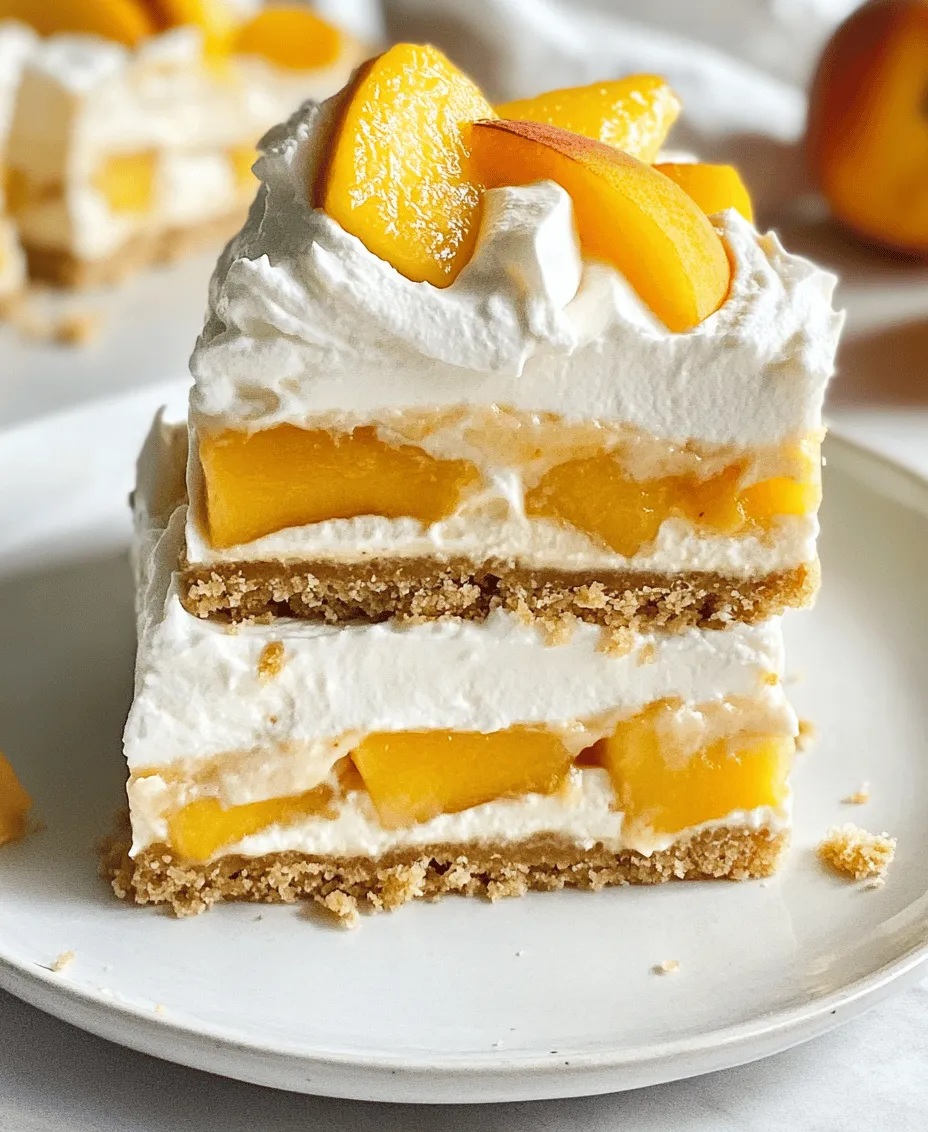
A great cheesecake needs an equally delicious crust, and for our bars, we use graham cracker crumbs. The crumbly texture of the crust provides a delightful contrast to the smooth filling. Additionally, the slight sweetness of the graham crackers enhances the overall flavor profile of the dessert. Baking the crust helps to set its structure, ensuring that it holds up against the creamy filling.
Preparing for Success
Before diving into the recipe, a little preparation goes a long way toward ensuring success. Here are some essential steps to follow:
Preheating the Oven and Preparing the Baking Pan
Start by preheating your oven to 325°F (163°C). A preheated oven is crucial for baking cheesecake bars because it ensures even cooking and helps set the structure of the bars. While the oven is heating, prepare your baking pan. Line a 9×9-inch square baking dish with parchment paper, allowing some overhang to make it easier to lift the bars out once they are cooled. Lightly grease the parchment paper for easy removal.
Choosing the Right Peaches
Selecting the right peaches is key to achieving optimal sweetness and flavor in your dessert. Look for peaches that are not only ripe but also have a vibrant color and a slight give when gently squeezed. Yellow peaches are typically sweeter, while white peaches offer a more delicate flavor. If you want to amp up the flavor, consider using a mix of both types.
Tools and Equipment Needed
Before you begin, gather the necessary tools and equipment to streamline the process. You will need:
– A 9×9-inch baking pan
– Parchment paper
– Mixing bowls
– A hand mixer or stand mixer
– A spatula
– A cutting board and knife for slicing peaches
– Measuring cups and spoons
Having these items ready will make your baking experience much smoother and enjoyable.
Making the Crust
Now that you are prepared, let’s dive into creating the graham cracker crust. The crust is a crucial element that supports the filling and contributes to the overall texture of the cheesecake bars.
Preparing the Graham Cracker Crust
1. Crush the Graham Crackers: Start by crushing the graham crackers into fine crumbs. You can do this by placing them in a resealable plastic bag and using a rolling pin, or by pulsing them in a food processor until finely ground.
2. Combine with Sugar and Butter: In a mixing bowl, combine the graham cracker crumbs with granulated sugar. This adds sweetness to the crust. Melt unsalted butter and pour it into the crumb mixture. Mix well until the crumbs are evenly coated and the texture resembles wet sand.
3. Press into the Pan: Transfer the crumb mixture to the prepared baking pan and press it firmly into an even layer across the bottom. Use the back of a measuring cup or your fingers to ensure that the crust is compact and even.
Baking the Crust
Baking the crust is a crucial step that sets the foundation for your cheesecake bars. Here’s how to do it:
1. Bake the Crust: Place the crust in the preheated oven and bake for about 10 minutes, or until it is lightly golden and fragrant. This step not only enhances the flavor but also helps to create a stable base for the cheesecake filling.
2. Cool the Crust: Once baked, remove the crust from the oven and allow it to cool slightly while you prepare the filling. This will help to prevent the filling from melting into the crust when poured.
Creating the Cheesecake Filling
With the crust baking and cooling, it’s time to focus on the star of the show: the cheesecake filling. This step is where the magic happens, transforming simple ingredients into a creamy, luscious filling.
Preparing the Cheesecake Filling
1. Softening the Cream Cheese: Begin with room temperature cream cheese. Softening it allows for a smooth and creamy texture without lumps. If you forget to take it out in advance, you can cut it into small cubes and microwave it for about 10 seconds, just until soft.
2. Mixing the Ingredients: In a mixing bowl, beat the softened cream cheese until creamy and smooth. Gradually add the granulated sugar, mixing until well combined. Then, add the sour cream and vanilla extract, continuing to mix until the batter is smooth and creamy.
3. Incorporating the Peaches: Gently fold in the chopped fresh peaches, ensuring they are evenly distributed throughout the cheesecake mixture. The peaches should be diced into small pieces to ensure every bite is filled with their delightful flavor.
4. Pouring the Filling: Once the filling is well combined, pour it over the cooled graham cracker crust. Use a spatula to spread it evenly, smoothing the top for a polished finish.
This step sets the stage for baking the cheesecake bars to perfection. Once the filling is ready, it will be time to bake them, creating a delectable dessert that will have everyone coming back for seconds.
Stay tuned for the next part of this article, where we will detail the baking process and guide you through the final steps to create your Peaches and Cream Cheesecake Bars.
Tips for Incorporating Eggs and Sour Cream Without Overmixing
When preparing the cheesecake layer for your Peaches and Cream Cheesecake Bars, incorporating eggs and sour cream is crucial for achieving that creamy, rich texture. To ensure you don’t overmix, follow these simple tips:
1. Add Eggs One at a Time: When mixing in the eggs, add them one at a time. This helps to incorporate each egg fully before adding the next, minimizing the risk of overmixing.
2. Mix on Low Speed: Use a hand mixer or stand mixer on low speed when adding eggs and sour cream. High speeds can incorporate too much air into the batter, resulting in cracks during baking.
3. Incorporate Sour Cream Gently: When adding sour cream, fold it in gently with a spatula instead of mixing vigorously. This keeps the mixture smooth without incorporating excess air.
4. Scrape the Bowl: Make sure to scrape the sides and bottom of the mixing bowl to ensure all ingredients are well combined without excessive mixing.
The Role of Vanilla Extract in Enhancing Flavor
Vanilla extract is a vital ingredient that elevates the flavor profile of your cheesecake bars. It works to round out the sweetness and provides a warm, aromatic quality that complements the richness of the cream cheese. Here’s how to use it effectively:
– Choose Pure Vanilla Extract: Always opt for pure vanilla extract instead of imitation vanilla for the best flavor. The quality of ingredients can significantly impact the final taste of your dessert.
– Add at the Right Time: Incorporate the vanilla extract after creaming the cream cheese and sugar. This ensures that its flavor is evenly distributed throughout the batter.
Baking the Cheesecake Layer
Baking your cheesecake layer properly is essential for achieving the perfect texture. Here are some guidelines to follow:
1. Preheat the Oven: Ensure your oven is preheated to 325°F (163°C). A consistent temperature helps in even baking.
2. Use a Water Bath: For a creamier texture and to prevent cracking, consider using a water bath. Wrap the outside of your baking pan with aluminum foil to prevent leaks. Place the pan in a larger dish filled with hot water, and bake as directed.
3. Monitor Baking Time: Bake for approximately 40-50 minutes. The edges should be set, but the center will still have a slight jiggle. This indicates that it will firm up as it cools.
4. Signs of Doneness: A properly baked cheesecake will appear slightly puffed, and the edges will have a light golden hue. If the center is still very wet, continue to bake in 5-minute intervals, checking frequently.
5. Cooling and Chilling: Once baked, turn off the oven and leave the cheesecake inside with the door ajar for an hour. This gradual cooling helps to prevent cracks. Afterward, remove it from the oven and allow it to cool to room temperature before refrigerating for at least 4 hours, preferably overnight.
Whipping Up the Cream Topping
Creating a luscious whipped cream topping is the final touch that brings your Peaches and Cream Cheesecake Bars to life. Here’s how to make the perfect whipped cream:
1. Use Heavy Cream: Always use heavy cream or heavy whipping cream for the best results. Its higher fat content ensures a stable and rich topping.
2. Chill Your Tools: For optimal whipping, chill your mixing bowl and beaters in the freezer for about 15 minutes before whipping. Cold tools help the cream whip more quickly and hold its shape better.
3. Whip Until Soft Peaks Form: Start whipping the cream on medium speed until it begins to thicken. Gradually add powdered sugar and vanilla extract for sweetness and flavor. Continue whipping until soft peaks form—this means the cream should hold its shape but still be smooth and creamy.
Assembling the Peaches and Cream Cheesecake Bars
Once your cheesecake layer has cooled and set, it’s time to assemble the dessert beautifully:
1. Prepare the Cheesecake Layer: Once cooled, spread the whipped cream topping evenly over the cheesecake layer, using a spatula to create a smooth surface.
2. Decorate with Peach Slices: Arrange fresh peach slices on top of the whipped cream, either in a decorative pattern or scattered throughout. For an appealing presentation, consider overlapping the slices slightly.
3. Chill Before Serving: After assembling, cover the dessert with plastic wrap and chill it in the refrigerator for at least 2 hours. This allows the flavors to meld and the whipped cream to firm up.
Cutting and Serving Suggestions
Cutting your cheesecake bars neatly can enhance presentation significantly. Here are some techniques and serving suggestions:
1. Use a Sharp Knife: To achieve clean cuts, use a sharp knife dipped in hot water. Wipe the knife clean between cuts for the best results.
2. Serving Size: Cut the bars into small squares, about 2 inches in size. This portion is ideal for serving as a dessert, allowing guests to enjoy without feeling overwhelmed.
3. Pairing Options: These cheesecake bars pair beautifully with fresh fruit, a drizzle of caramel sauce, or a cup of coffee or tea. For an added touch, consider serving with a scoop of vanilla ice cream.
4. Storing Leftovers: To keep leftovers fresh, store them in an airtight container in the refrigerator. They can last up to 4-5 days. If you want to freeze them, wrap each bar tightly in plastic wrap and then foil before freezing. Thaw in the refrigerator before serving.
Conclusion
Making Peaches and Cream Cheesecake Bars is not only a delightful culinary endeavor but also a treat for the taste buds. The combination of creamy cheesecake, fresh peaches, and fluffy whipped cream creates a dessert that is both satisfying and refreshing.
This recipe showcases the versatility of cheesecake, allowing you to experiment with different seasonal fruits to create your own variations. Whether it’s summer peaches, autumn apples, or winter berries, the possibilities are endless.
Encourage yourself to step into the kitchen and create these delicious bars, and don’t hesitate to try different fruit toppings and variations. Your taste buds will thank you!